
How To
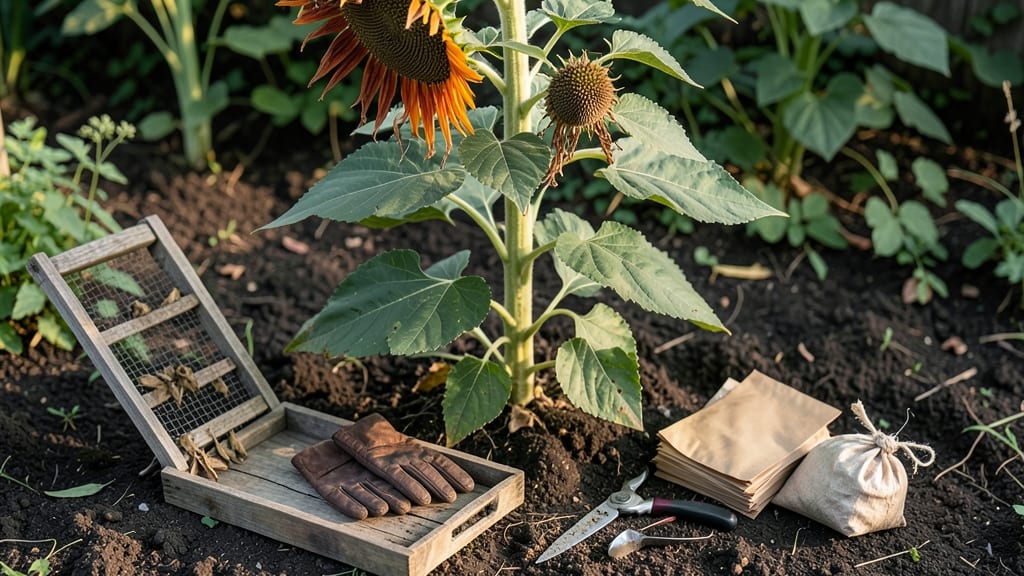
To harvest Mexican sunflower seeds 🌻, you’ll need to time it just right—when the flower heads turn brown and brittle, but before they split open on their own.
Picture this: you’ve spent months nurturing your Mexican sunflowers, and now the moment has arrived to save those seeds for next year’s garden or even for bird feeders. But one wrong move, and you’ll lose them to the wind or rain.
The key is knowing exactly when to act and how to dry them properly without damaging the seeds.
In this guide, I’ll walk you through the easiest way to identify mature seeds, the right tools to use, and a foolproof drying method that keeps your harvest intact.
Whether you’re saving seeds for replanting or just want to add a splash of color to your winter bird feeders, you’ll leave here with a clear, step-by-step plan.
No more guessing games—just a straightforward approach to harvesting seeds that stay viable for up to two years. Let’s get started!
When and how to identify Mexican sunflower seeds ready for harvesting
Mexican sunflowers (Tithonia rotundifolia) reward patient gardeners with vibrant seed heads packed with nutrients and striking color. Knowing when to harvest these sunflower seeds is crucial—collect too early, and you’ll waste potential; wait too long, and seeds scatter or spoil.
The key lies in watching for visual maturity cues that signal perfect harvest timing.
Start by observing the flower head color. Mature Mexican sunflowers transition from bright orange or yellow petals to dry, brown seed heads. This color shift indicates the plant has completed its flowering cycle and is ready for seed collection.
Pay close attention to the seed pod texture, which becomes brittle and papery when fully mature.
Another telltale sign is the seed rattling sound. Gently shake a dried flower head—if seeds inside rattle like a maraca, they’re ready for harvest. This acoustic maturity test works best when the seed head feels light and hollow.
If it’s still heavy or firm, wait a few more days before harvesting.
Seasonal timing also matters. In USDA Zone 6a, Mexican sunflowers typically reach maturity between late August and October. However, climate variations mean you might harvest earlier in warmer zones or later in cooler regions.
Always align your harvest with the plant’s natural drying cycle rather than a fixed calendar date.
Watch for natural seed dispersal signs. When seed pods begin splitting open on their own, it’s a clear indication that the seeds are nearly ready to fall.
If you miss this window, seeds may scatter before you can collect them. Timing your harvest just before this natural release ensures you capture the maximum yield.
| Maturity Indicator | Description | Action |
|---|---|---|
| Flower Head Color | Completely brown and dry | Check daily for full browning |
| Seed Pod Texture | Brittle and papery | Gently squeeze to test |
| Rattling Sound | Seeds move inside head | Shake gently to confirm |
| Natural Splitting | Pods begin cracking open | Harvest before seeds scatter |
| Stem Condition | Woody and brittle | Cut stems cleanly |
Avoid harvesting seeds when the flower heads are still green or yellow. Immature seeds won’t store well and may not germinate properly. Always prioritize fully dried seed heads—this ensures high-quality seeds for replanting or crafting.
If you’re unsure, cut one head, dry it indoors, and test for seed viability before harvesting the rest.
Climate plays a role in harvest timing. In hot, dry regions, Mexican sunflowers may mature faster, while cooler areas might extend the drying process. Monitor your plants closely, especially if you experience unexpected rain, which can delay drying.
A clear, dry forecast for at least 3-5 days is ideal for harvesting.
Once you’ve identified mature seed heads, act quickly. Use clean, sharp pruning shears to cut the stems about 6 inches below the flower head. This prevents moisture from the stem from spoiling the seeds during drying.
Immediately lay the cut heads in a well-ventilated area to begin the drying process.
Pro tip: Hang harvested seed heads upside down in small bundles using twine. This method accelerates drying and makes seed extraction easier later. Place them in a shady, dry spot to prevent mold or premature seed release.
With these steps, you’ll maximize your seed yield and ensure viability for future planting.
🌾
Step-by-step guide to drying and extracting Mexican sunflower seeds
Once your Mexican sunflower (Tithonia rotundifolia) seed heads turn brown and brittle, it's time to harvest. Proper drying and extraction ensures high-quality seeds that stay viable for up to 2 years.
Follow these steps to maximize your yield while avoiding common pitfalls like moisture damage or seed loss.
Start by cutting the seed heads with clean pruners or scissors, leaving a 1-2 inch stem. Bundle 5-10 heads together with twine and hang them upside-down in a well-ventilated area. This method mimics natural drying conditions and prevents mold growth.
🌻 Step-by-Step Guide
-
Step 1Harvest at peak maturity: Collect seed heads when they’re fully brown and dry, with seeds rattling inside. Use clean pruners to avoid contamination.
-
Step 2Dry indoors or outdoors:
- Indoor: Hang bundles upside-down in a dry, dark spot (e.g., closet) for 1-2 weeks.
- Outdoor: Lay heads on a mesh screen under a sheltered roof for 3-5 days (sunny, dry weather only).
-
Step 3Extract seeds: Once dry, rub seed heads between your hands or use a paper bag to shake out seeds. Sift through debris with a fine mesh sieve for purity.
-
Step 4Store properly: Keep seeds in a paper envelope or glass jar with a silica gel packet in a cool, dark place. Label with the harvest year for tracking viability.
For large batches, use a seed separator or fan blower to speed up extraction. Always test a few seeds for germination by planting them in moist soil—if they sprout within 7-14 days, your storage method is successful.
Store seeds in airtight containers with a desiccant packet to prevent moisture absorption. Check them every 6 months for signs of mold or pests. If stored correctly, these seeds can last 2 years while maintaining 90%+ germination rates.
Use your harvested seeds for replanting next season, creating wildlife feeders, or even as natural dyes. Just remember: patience is key—rushing the drying process can ruin your seed yield!