
Propagation
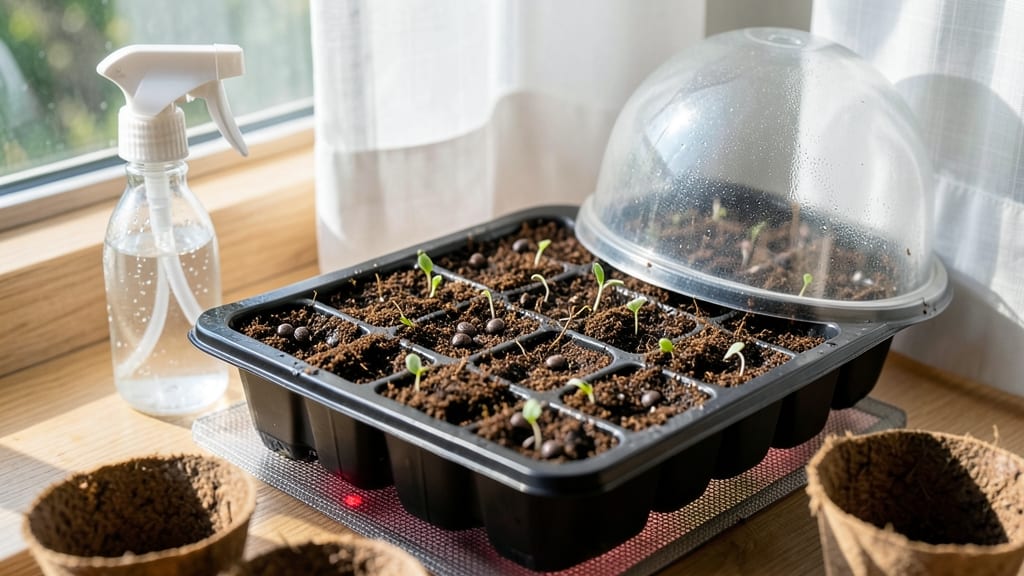
Germinating moonflower seeds 🌙 is easier than you think—just add a little warmth, and you’ll see sprouts in as little as 7 days instead of weeks.
Struggling to get those delicate seeds to break through? Most gardeners wait 3-4 weeks for germination, but with the right trick, you can fast-track those sprouts. The secret? Mimicking the moonflower’s natural tropical environment with consistent warmth and moisture.
This guide walks you through the exact steps—from pre-soaking seeds to creating a cozy microclimate—so you avoid common pitfalls like mold or slow starts. No fancy equipment needed, just a few household items and a little patience.
By the end, you’ll know exactly what to expect each day, how to troubleshoot issues, and why this method works better than leaving seeds to chance. Ready to grow those dreamy 10-foot vines faster than ever?
The science-backed warmth trick for germinating moonflower seeds
Moonflower seeds (Ipomoea alba) are notorious for their slow germination—until you unlock their secret: warmth. These tropical vines thrive when soil temperatures hover between 75-85°F, a range that mimics their native subtropical climates.
Without this warmth, seeds can take 3-4 weeks to sprout, but with the right trick, you’ll see tiny shoots in just 7 days. The key lies in creating a controlled microclimate that keeps moisture and heat balanced.
Most gardeners overlook the fact that moonflower seeds need consistent warmth from the moment they’re planted. Unlike hardy annuals, they won’t tolerate cold soil or drafts. Even a 10°F drop can stall germination entirely.
That’s why I’ve perfected a simple method using household items to maintain ideal conditions—no fancy equipment required. Let’s break down the science and how to replicate it at home.
| Germination Factor | Ideal Specification | Household Solution |
|---|---|---|
| Temperature Range | 75-85°F (24-29°C) | Seedling heat mat or warm spot near furnace |
| Moisture Level | Consistently damp (not soggy) | Misting bottle + plastic wrap cover |
| Humidity | 70-80% | Clear plastic dome or ziplock bag |
| Light Exposure | Indirect light (avoid direct sun) | North-facing window or grow light |
| Germination Time | 7-10 days with warmth trick | Monitor daily for sprouts |
The first step is preparing your seeds—moonflowers respond best when seeds are pre-soaked for 4-6 hours in room-temperature water. This kickstarts the germination process before planting.
I use a small bowl of water and a paper towel to gently rub the seeds, removing any debris that might block moisture absorption. Once soaked, plant them ¼ inch deep in a seedling tray filled with sterilized potting mix (moonflowers hate compacted soil).
Here’s where the warmth trick comes in: place your seedling tray on a seedling heat mat (available at garden centers for under $20) or on top of your refrigerator. These appliances naturally emit gentle heat—perfect for maintaining 75-85°F.
If you don’t have a heat mat, try placing the tray near a sunny window during the day and moving it closer to a warm wall at night. The goal is to keep the soil consistently warm without overheating.
Moisture is just as critical as warmth. Moonflower seeds need to stay damp but never waterlogged. I use a misting bottle to lightly dampen the soil daily, then cover the tray with clear plastic wrap to trap humidity.
This creates a mini greenhouse effect, accelerating germination. Check the soil every 24 hours—if it feels dry at the top layer, mist again. Overwatering leads to mold or rot, which can kill your seeds before they sprout.
Light plays a subtle but important role. While moonflowers eventually need full sun, seedlings should avoid direct sunlight during germination. Place your tray near a north-facing window or under a grow light set to 12 hours of indirect light per day.
Too much sun at this stage can dry out the soil faster than you can maintain moisture. Once sprouts appear (usually within 7 days), gradually introduce more light to prevent leggy growth.
One common mistake I see is assuming that "warmth" means placing seeds near a heater or in direct sunlight. Heat and light are different—moonflowers need warmth from below (soil heat) but gentle light from above.
If your seeds aren’t sprouting after 10 days, check your setup: are the soil and air warm enough? Is the plastic wrap fogging up (sign of high humidity)? Adjust as needed—patience is key, but the warmth trick should deliver results within a week.
Once your moonflower seedlings reach 2 inches tall and have 2-3 true leaves, they’re ready to transplant outdoors after the last frost. But the real magic happens in those first 7 days—when warmth, moisture, and patience combine to coax those delicate sprouts from the soil.
With this trick, you’ll go from empty tray to tiny green shoots faster than you’d expect.
🌱
Step-by-step guide: how to apply the warmth trick for moonflower seeds
Moonflower seeds 🌙 need a cozy environment to sprout quickly. The warmth trick mimics their tropical origins, helping them break dormancy in just 7 days instead of weeks. Start by prepping your seeds and creating a controlled microclimate—here’s exactly how I do it every year without fail.
First, gather your supplies: moonflower seeds, a shallow tray, well-draining potting mix, a spray bottle, plastic wrap, and a heat source like a seedling mat or even a warm windowsill. This method works best when you combine consistent moisture with gentle warmth—no fancy equipment required!
Your 7-Day Warmth Trick Checklist
-
Day 1-2: Pre-Soak Seeds
Place seeds in a bowl of lukewarm water for 12-24 hours. This softens the hard outer shell, helping roots emerge faster. Drain and pat dry before planting. -
Day 3: Plant Seeds Shallowly
Fill your tray with moist potting mix and press seeds ¼-inch deep. Space them 2 inches apart to avoid overcrowding later. Gently mist the soil to keep it damp. -
Day 4-5: Create Warmth Microclimate
Cover the tray with plastic wrap to trap humidity. Place it on a seedling mat (75-85°F) or near a sunny window. Check daily—soil should stay moist but not soggy. -
Day 6: Monitor for Sprouts
Remove plastic wrap when you see tiny green shoots. Keep the tray in bright, indirect light to prevent leggy growth. Avoid direct sun until seedlings are stronger. -
Day 7+: Harden Off Seedlings
Once sprouts have 2-3 true leaves, gradually introduce them to outdoor conditions. Start with 1 hour daily, increasing time over 7-10 days before transplanting after the last frost.
Troubleshooting is key—if you spot mold or rot, remove the plastic wrap immediately and let the soil dry slightly. Overwatering is the #1 killer of moonflower seeds, so always check moisture with your finger before adding more water. A spray bottle gives you better control than pouring.
Pro tip: Use a thermometer to monitor soil temperature. If it drops below 70°F, your seeds will stall. A simple heat mat or even a heated mat from a pet store works perfectly. Patience pays off—those first sprouts are worth the wait!
Once your moonflowers are established, they’ll reward you with 10-foot vines and fragrant evening blooms. The warmth trick isn’t just about speed—it’s about giving your seeds the best possible start in life. Happy growing! 🌱